Typescript Tutorial Series - 01.Getting Started

Hi there 🖐️
My name is Milad and welcome to the first part of the typescript tutorial series. In this part we are going to get started with typescript; So stay with me through this amazing and fun journey.
Introduction
Programming languages can be categorized into two main types: statically typed and dynamically typed languages. In statically typed languages like C++, C#, and Java, the data types of variables are determined at compile time and then fixed. They cannot be changed later. However, in dynamically typed languages such as Python, JavaScript, and Ruby, the data types of variables are only checked at runtime and can be modified after the initial assignment.
TypeScript is built on top of JavaScript by adding static typing and other helpful features for writing robust code. Most integrated development environments (IDEs) that support TypeScript, provide excellent autocompletion due to its static type checking which boosts programmer productivity. The type information also enables better refactoring assistance in IDEs. Refactoring means altering the structure of code without changing its behavior. Additionally, more bugs can be caught during compilation with TypeScript versus plain JavaScript.
Browsers cannot directly execute TypeScript code. The TypeScript compiler must transpile TypeScript into plain JavaScript that browsers can understand.
Setting up the development environment
First of all, we need to install nodeJS to install the typescript compiler. Make sure to install the latest LTS version of that.
If you are Windows OS: Download the
node-v******.msifile and then install it.If you are on Mac OS: Download the
node-v******.pkgfile and then install it.And if you are on Linux OS like me, luckily for us, we have a lot of options based on what type of distro we are using; Open up the terminal window and:
If you are on Arch-based distros:
sudo pacman -S nodejs npmIf you are on Opensuse distro:
sudo zypper install nodejs
For more information, visit this page.
Second, we need to install typescript compiler. To do so, open up your cmd or terminal window and type the following command:
npm i -g typescript
The command above will install typescript globally so that we can access the compiler everywhere inside the OS. You can make sure that whether typescript compiler is installed properly or not by running the following command:
tsc -v
# Version 5.1.6
In case the typescript compiler is installed properly, the command above will return its version.
Third, we are going to use the vscode editor, so make sure to download and install it on your OS.
Write your first typescript program
Create a new directory for the project files as follows(In case you are on MacOS or Linux) and open it in vscode:
mkdir typescript_course
cd typescript_course
code .
Now create a typescript file called index.ts. As I mentioned earlier, typescript is built on top of javascript so that we can type any javascript code inside the typescript file and it's valid; For example:
console.log("Hello World");
Now we need to compile the index.ts file using the command below:
tsc index.ts
By hitting the enter key, the typescript compiler generates a new file called index.js which is the result of the compilation process. Since we had not used any typescript feature in our file, index.ts and index.js are the same at this time.
Now let's use a typescript feature; we are going to use the type annotation for a variable using : type syntax. For example:
let age: number = 27;
Since we have declared the age variable as a number, we can't set it to string or other types; If we do so, we will get an error:
let age: number = 27;
age = "27";
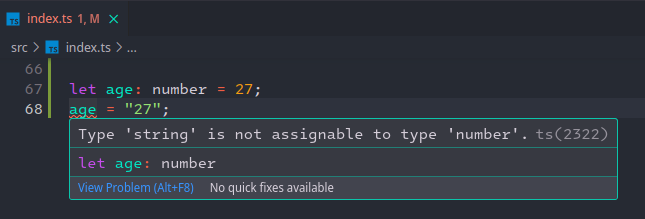
We can use typescript to catch a lot of mistakes at compile time. Now let's remove our error-prone line of code and re-compile the index.ts file.
tsc index.ts
Look at the index.js code that the typescript compiler generated:
var age = 27;
As you see, we have var keyword instead of let keyword because by default typescript compiler uses an older version of javascript which is ES5(EcmaScript5). We also don't have the type annotation because it is purely for typescript not for javascript and javascript code does not specify the type of this variable.
TypeScript Configuration
Now let's talk about creating the configuration file for the typescript compiler. To do so we need to run the following command:
tsc --init
The command above will generate the config file called tsconfig.json with the mentioned settings in the terminal window:
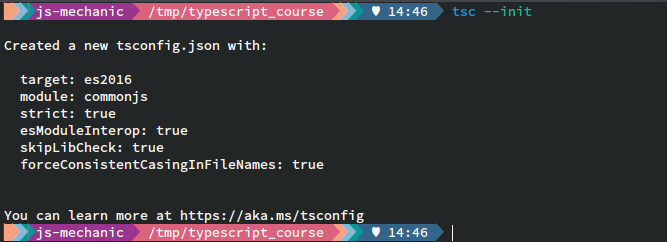
Open up the tsconfig.json file; As you can see, this file has a lot of categorized settings. Most of them are commented out by default and each of them has a corresponding description in front. Let's get familiar with its basic ones:
Language & environment:
"target": "es2016"which is the target version of the javascript that the typescript compiler is going to compile to and it's an old standard and the safest javascript code for all browsers out there. To see all other version options that you can choose, just removees2016part and hit thectrl + spacekeys.
Modules:
"rootDir": "./"This option specifies the root directory that the typescript compiler should watch and compile.tsfiles. So we need a brand new directory for that:mkdir src/ mv index.ts ./src/and then set
rootDirvalue to the new directory:"rootDir": "./src"
Emit:
"outDir": "./"This option specifies the directory that the typescript compiler will store compiled javascript files in there. Since we are going to change its value, we need another directory as well:mkdir dist/and then set
outDirvalue to the new directory:"outDir": "./dist""removeComments": trueBy uncommenting this option we prevent the typescript compiler from compiling comment lines inside.tsfiles which reduces the size of.jsfiles."noEmitOnError": trueBy default when we compile our code, even if we have an error in the code, the typescript compiler will still generate javascript files. So by enabling this option, the typescript compiler won't generate javascript code in case we have any error.
Let's go back to the terminal; Since we have the typescript configuration file, we can compile all .ts files in the project simply by running the following command:
tsc
Now check out the project directories. As you can see we have /dist directory which contains the index.js file.
Debugging TypeScript Programs
Let's talk about debugging our typescript program in vscode. This is very useful when things go wrong or our code does not work as expected. So we can run the code line by line and see what's exactly happening under the hood.
Let's open up the tsconfig.json file and on the Emit section, uncomment "sourceMap": true option. The source map file specifies how each line of our typescript code matches the generated javascript code. Now we need to go back to the terminal and re-compile index.ts file:
tsc
Then look at the project files, inside the dist/ directory, as you can see we have another file called index.js.map. The debuggers use source map file content, not us; So don't attempt to read its content. To make the debugging process more fun, let's add some logic to our typescript code:
let age: number = 27;
if (age < 50) {
    age += 30
}
Then click on the left-hand side of the first line so that insert a break-point there. When we start debugging, the execution stops right on that line and from that line forward, we can execute the code line by line:

Open up the debug panel on vscode and click on create a launch.json file
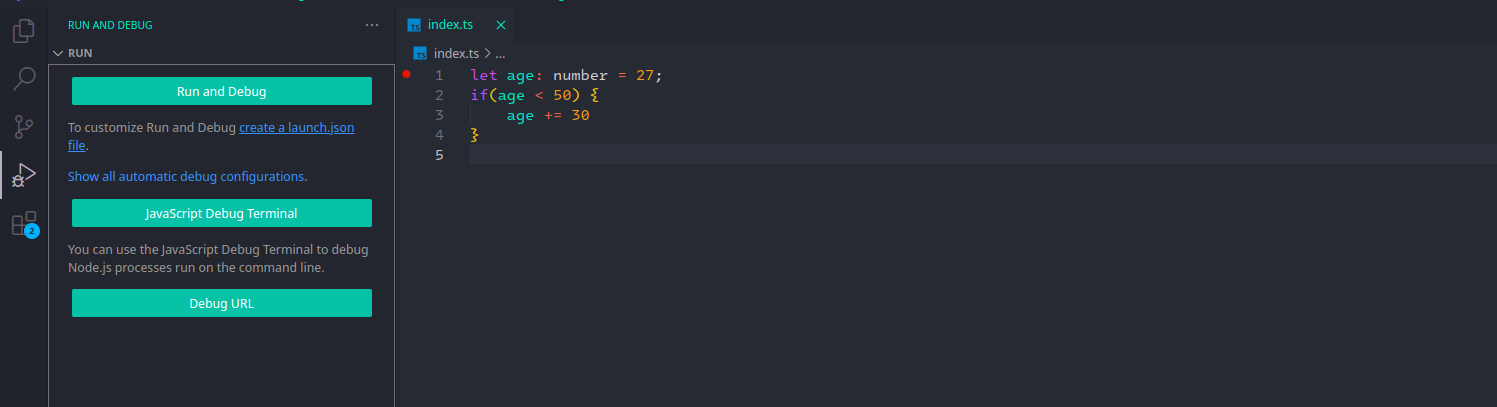
And then select Node.js option. This will generate launch.json file in the project. Open up that file and as you can see it has some configurations that tell vscode how to debug our code; But we need to add another config option to that file. This config file is so sensitive and each character does matter even the space character, so make sure to apply the change in the same way as mine:
"preLaunchTask": "tsc: build - tsconfig.json"
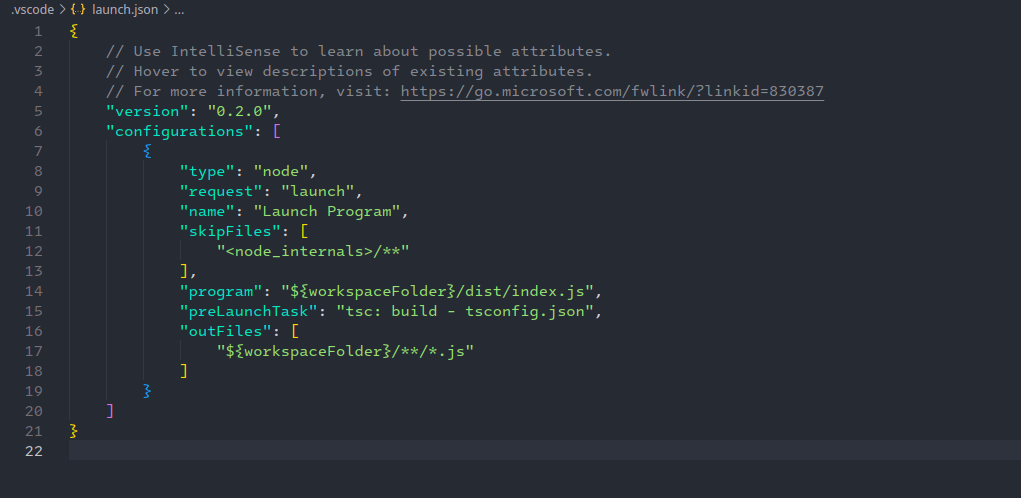
With this line of setting, we tell vscode to use typescript compiler to build our program using tsconfig.json configuration file. To start the debugging process, open up the debugging panel on vscode and click on Launch Program button at the top left corner of the editor:
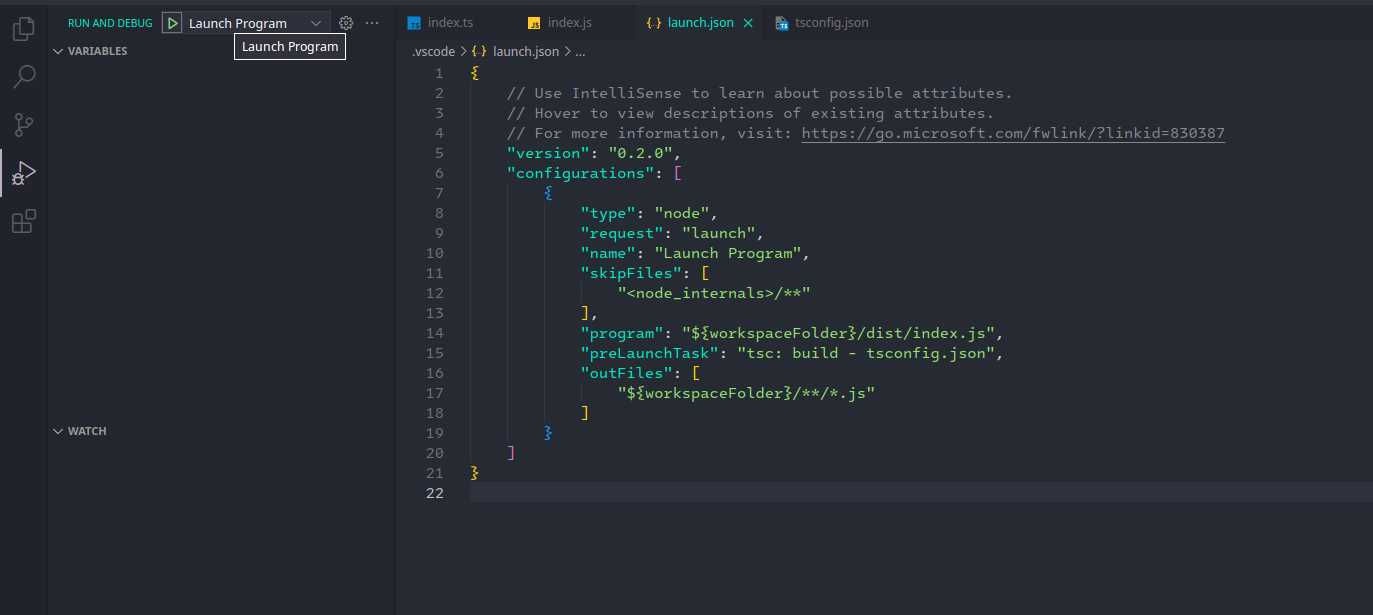
Now the debugging process started and the execution stopped at the breakpoint. Vscode provides some tools and we need to get familiar with them first:
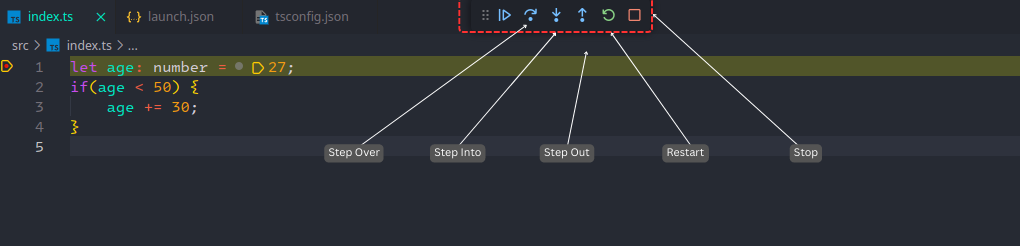
Step Over: To execute one line
Step Into: To step into a function
Step Out: To step out of a function
Restart: To restart the debugging process
Stop: To stop the debugging process
Now, click on Step Over button to go to the next line. By the way, we can even expand the variables menu to check out all detected variables in this session Moreover, If we are going to keep track of a certain variable, we just need to expand the watch menu and then type the name of variable.
Let's step over three times to increase the value of age variable. Value of variable is increased but since our program is terminated, we are no longer able to see that; To do so, we need to add a line of code at the end of index.ts file:
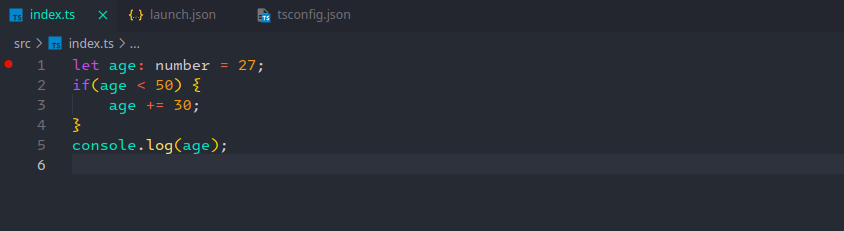
Let's restart the debugging process and step over three times. If you check out the watch menu, the value of the age variable is 57:
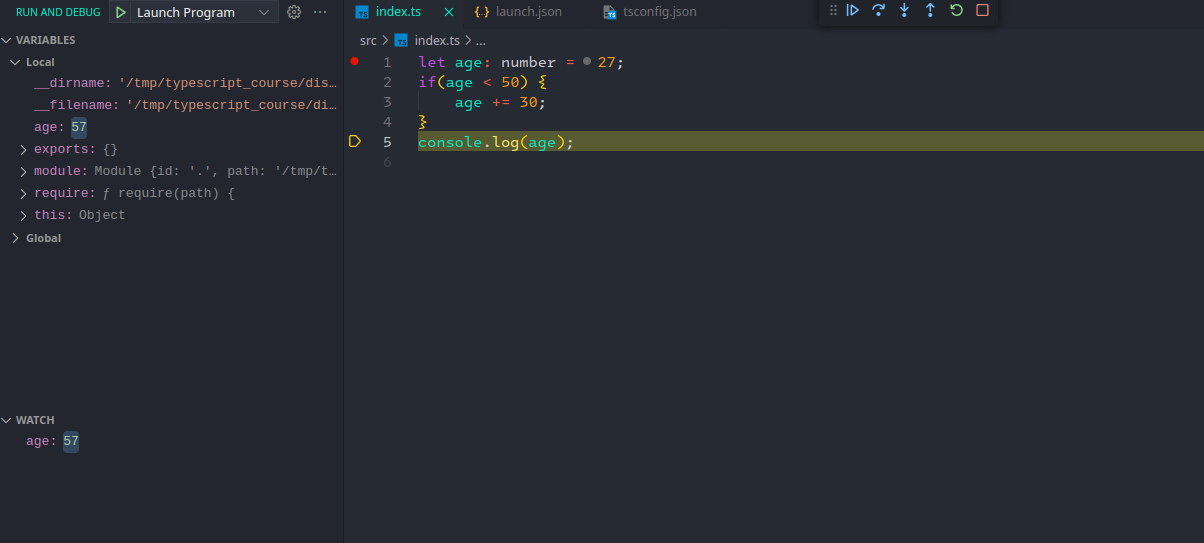
Since we are done with the debugging process, we can stop it by using stop button. This is how we debug our typescript programs in a nutshell.
I hope you enjoyed it, see you next time 👋


